Working on the Miata, part 2
Ok so we left off with a few maintenance items done on the Miata. Here come more small stuff; we'll go over more general maintenance items, track preparation of sorts, and a little visual improvement as well.
Foamectomy
 Like I mentioned, I had the intention of taking the little thing to the track. Now the Miata is a tiny little car. And not just on the outside. My head does not actually touch the canvas top normally but with the top down and a helmet, surely the topmost part of the helmet will protrude from the winshield edge. And track staff don't like that. Well, your head likes that even less when you flip over the car and end up taking the full weight of the car on it, and on your neck. Snap snap.
Let me introduce you to the concept of the "broomstick test" The idea is to run a straight object such as a broomstick, from the top of the windshield to whatever it will rest on going towards the back. Do an image search on Google for "broomstick test" and you'll get the idea. As a rule of thumb, your head must be below the broomstick for you to pass the test. So one cheap mod to help in that for the Miata and other small cars, is to lower the seat, namely remove foam padding from the seat so you end up seating lower. Lovingly called a "foamectomy", you remove foam from the bottom seat after gaining access to it by removing the seat and peeling back the seat cover.
There's not much to it really, but it's a little tedious. One advice I got repeatedly is to go really aggressive with the removal. Of course if you remove, say 5 cm of foam, you'll actually get a final lowering of much less than that, probably 1cm because the foam gets compressed. So appearances can be deceiving. Alas, I was to find out afterwards that I didn't go aggressive enough. But more on that later.
Here's a short pictorial with descriptions of the procedure:
https://plus.google.com/photos/102301819339392179947/albums/6067004342570031681?authkey=CIijlb-9n4vlUQ
Steering Wheel Cover
Having a factory leather-wrapped steering wheel that had seen 140k miles, it was expected that it wouldn't be in good shape. Apart from being kind of shiny and slippery, there were actual tears in the leather, as can be appreciated in the picture below, top of the wheel.
And since my previous attempt at glueing and sewing a new leather cover on the Z went pretty well, I decided to do it again, for the Miata. So I contacted my friends at redlinegoods.com and ordered the part. It is the same nice thick leather, with a pre-stitched pattern that is pretty easy to follow.
The procedure is the same: disconnect battery, remove steering wheel airbag cover, remove airbag, remove wheel. Again I was able to remove the wheel without a steering wheel puller, just by gently wedging it back and forth. From then on, it's more or less the same story. Except that this cover didn't quite fit as well as the last one. The shape was perfect, but somehow it came short, no matter how much I tried to stretch it, I couldn't get the ends to meet in most places around the rim. The stitching itself sort of compensates for that but still you can fill a bit of a gap. Anyway, here's a shot of the wheel almost finished, and after that a link to the full album with descriptions:

https://plus.google.com/photos/102301819339392179947/albums/6089619109439717665?authkey=CIGRkr6z0q-s_QE
By the way, just to exemplify how I'm using this little guy for everything: I bought a Thule bike carrier, strapped it to the back of the Miata, and off I went to the hills. It held up like a champ.

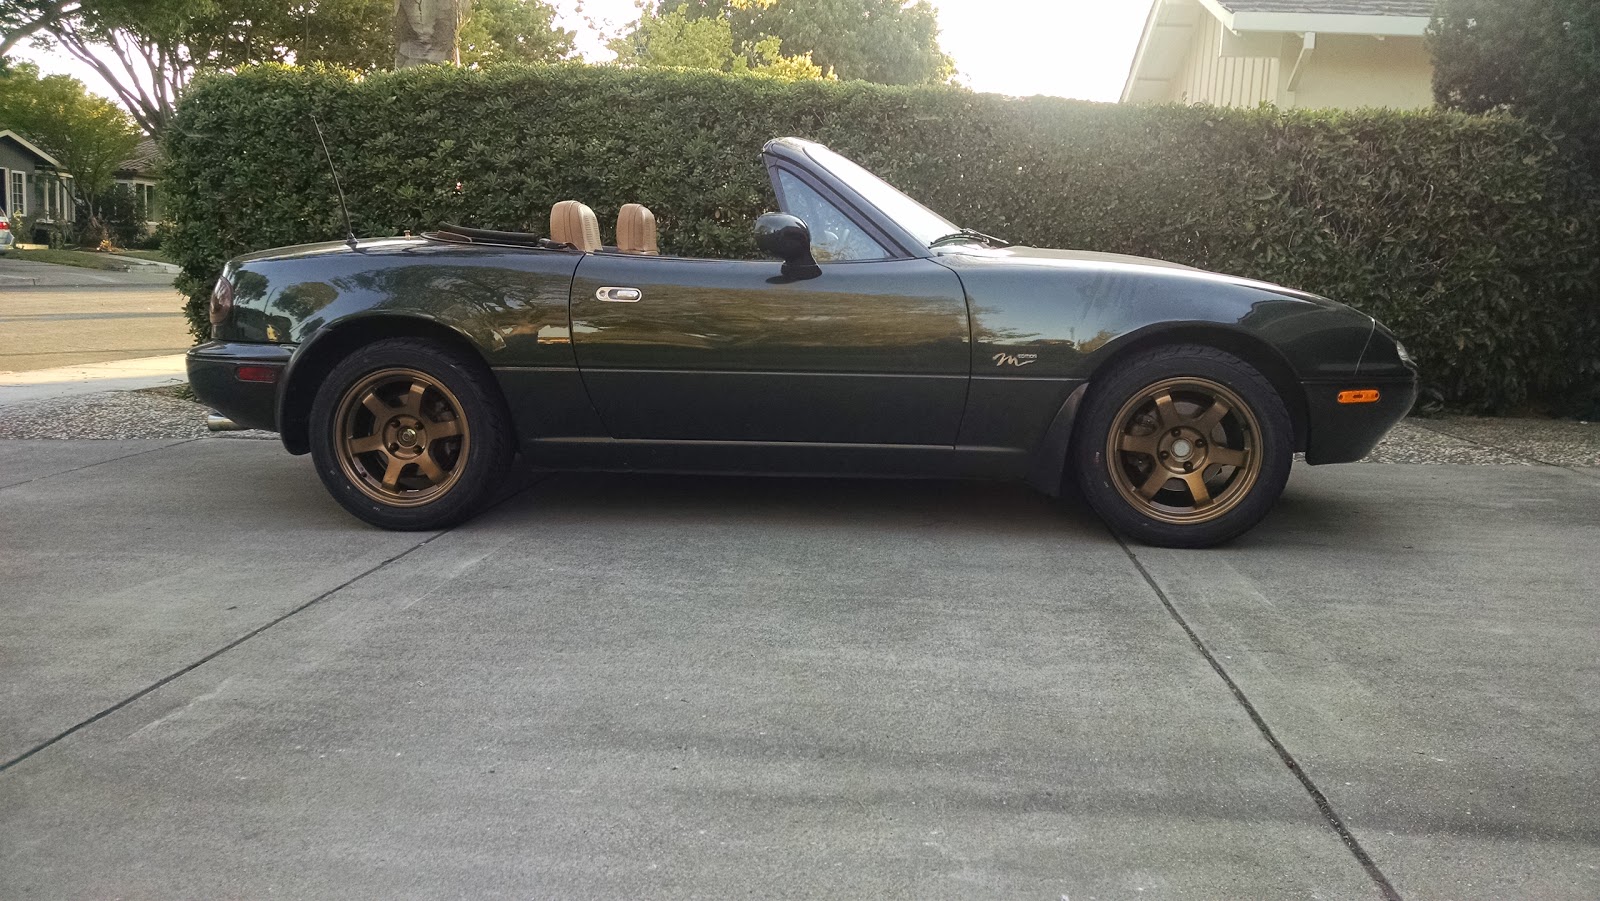
New Wheels
The original wheels for the '97 M-edition Miata are 6-spoke 15 inch chrome wheels. I've never been a fan of chrome, and it was peeling and corroding at places so they looked pretty bad. Also the tires were of a no name Chinese brand and I don't think they would grip a lot on the track or on the rain for that matter. So even though I don't think it was mandatory, I indulged in getting new wheels to improve appearance along with better traction. I wanted to keep the green/tan theme so I looked for bronze finish, and I landed on Rota wheels, same diameter but a little wider to accept wider rubber.
I don't think they are exceptionally good quality or anything, but they seem to perform well and they are lighter than the stock ones, which is always, always a good thing. Search for "unsprung mass" and there's some physics justification to focus on lowering it, more than the masses supported by the suspension.
To go along with the new wheels, I got Yokohama S.Drive 205/50R15 tires, up from the 195/55 ones the old wheels had.
https://plus.google.com/photos/102301819339392179947/albums/6042453674312610033?authkey=COX_voqYvMaoZQ
Not a hardcore set of tires for the track or anything, but loads better than the chinese noname ones that were mounted.
Rollbar
It's only common sense that if a convertible rolls over, there's a good chance that part of the weight of the car will end up being supported by the occupants' heads, even if the A-pillars hold. Which most probably they won't. No surprise then that most track day organizations do not allow convertibles unless some form of rollover protection is installed. Some modern convertibles have pop-up hoops that are good enough to withstand the impact. Some don't, and most 4-seat convertibles are deemed too risky even if they have the hoops. Anyway, the Miata has no such things so the only option is to install a rollbar. The most popular option for Miatas seem to be the Hard Dog line of rollbars. I selected the Ace because it's mounted enough far back as to not pose that much of a threat while driving it normally on the street without a helmet, but still allows the use of hard and soft tops including the rear glass window like mine has. I got the one with one diagonal; in hindsight for $40 more I should have gotten the one with two. Apart from being a bit stronger, it offers a bit better visibility. Not a big deal.Installing a rollbar involves removing all sorts of trim and plates from various places, and drilling holes in order to attach backing plates and bolting the bar to specific points of the chassis that are strong enough. As a result your chassis itself ends up a bit stronger. It's usually a two-person job but since I have no friends, I did it on my own. Just kidding of course; I guess I don't have any close friends in the USA that are enthusiastic enough about this stuff to get me to ask. But I do have people who care about me, I swear. I repeat that to myself as I cry myself to sleep.

Here's the annotated and as usual, pretty incomplete recount of the whole process. But there are nice comments so go ahead and look.
https://plus.google.com/photos/102301819339392179947/albums/6060696548881949409?authkey=CPLaqarQhK-p4wE


Comments
Post a Comment